
Built-in tester
The test bar in the endpoint editor sends a real request to your running mock and shows the reply underneath, so you can check an endpoint without leaving the app.
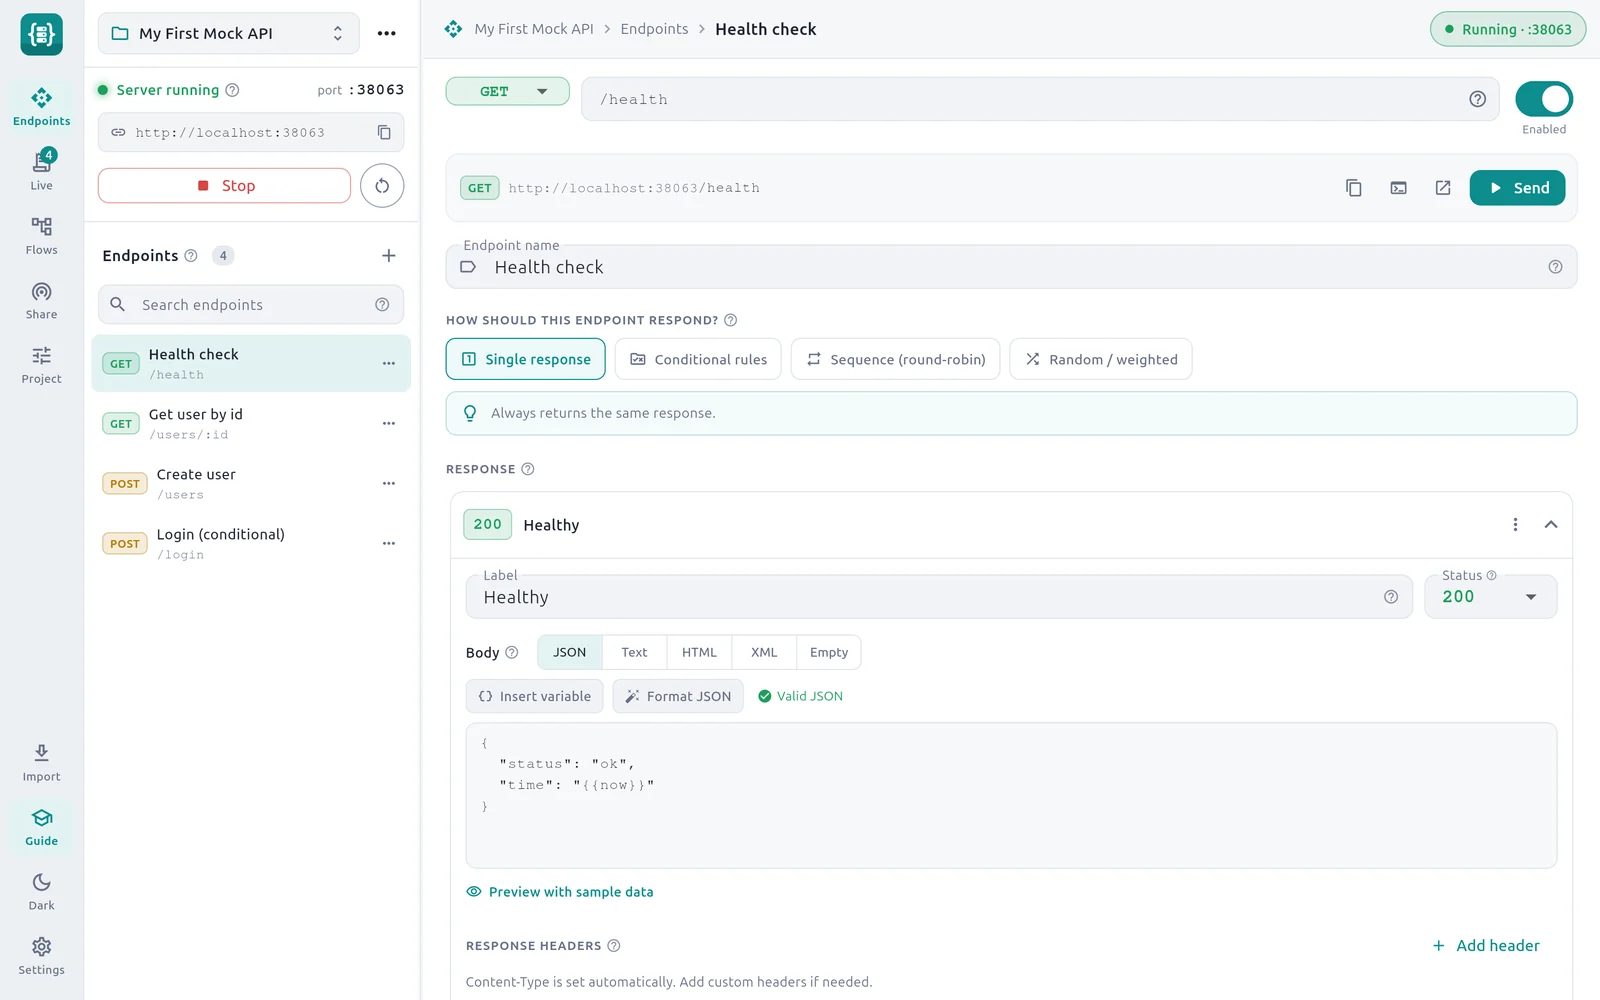
- 1Method — The method the test request uses.
- 2Test URL — The address to call. You can edit the path.
- 3Copy URL — Copies the full address.
- 4Copy as cURL command — Copies a ready-made curl command.
- 5Open in browser — Opens the address in your default browser.
- 6Send — Sends the request and shows the response below.
Send a test request
Start the server: select Start server in the side panel, or click the Stopped pill at the top right.
Select an endpoint in the list.
Select Send in the test bar.
Under the bar you see the status code, the response time in milliseconds and the Response body. JSON is shown indented so it is easier to read. The time is the full round trip, including any simulated delay.
While the server is stopped, Send is greyed out and the bar reads Start the server to send a live test request: tap Stopped at the top, or Start server.
Edit the test URL
The bar fills in a path you can call straight away. Parts of the path that are patterns get sample values:
| In the endpoint path | In the test URL |
|---|---|
:id or any :name | 1 |
* | sample |
** | sample/path |
So /users/:id becomes http://localhost:8080/users/1.
Click the path and change it to try other values. Type /users/42 to send a different id, or add a query string such as /users/42?expand=orders to test rules on query parameters. The base address, http://localhost: and the port, stays fixed.
Send a request body
For endpoints with the method POST, PUT, PATCH or ANY, a Request body row appears under the bar while the server is running. Select it to expand the editor.
- The body starts as
{"name": "Test"}. Edit it to match what your endpoint expects. - The request is sent with
Content-Type: application/json.
This is how you try rules that read body fields. For the sample Login (conditional) endpoint, set the body to {"password": "secret"} and select Send to get the 200, then change the password to see the 401.
What the tester adds for you
- A required auth header. If the endpoint has Require an auth header turned on, the tester sends that header with the value
Bearer test-token, so the test passes the check. - GET for ANY. An endpoint with the method ANY is tested with
GET.
The tester does not let you add your own headers or choose another method. For those, copy the curl command and edit it, or use an API client such as ApiWorkbench.
If no reply arrives within 30 seconds, for example from a response with the Hang (never respond) fault, the tester stops waiting and shows Request failed: with the reason.
Copy the URL or a curl command
Copy URL puts the full address on the clipboard, for pasting into your app's configuration or a browser.
Copy as cURL command builds a command that matches the test request. For a POST endpoint that requires auth, it looks like this:
curl -X POST 'http://localhost:8080/users' \
  -H 'Content-Type: application/json' \
  -d '{
  "name": "Test"
}' \
  -H 'Authorization: Bearer YOUR_TOKEN'
Paste it into a terminal and press Enter. The auth header carries the placeholder YOUR_TOKEN; any non-empty value passes the mock's check. See Import cURL to turn the command into a saved request in ApiWorkbench.
Open in browser
Open in browser opens the test URL in your default browser. A browser sends a GET request, so this suits GET endpoints. For an HTML body you see the page; for JSON, most browsers show the text or a formatted view.
See the request in the log
Every test request goes through the real server, so it also appears in the Live section with the matched endpoint, the response label and the full headers. See Live request log.