
Parts and shopping list
The Parts tab turns "what do I need to buy?" into a list. Tick what you already own, choose the labs and projects you want to build, and download the rest as a Markdown checklist or a spreadsheet.
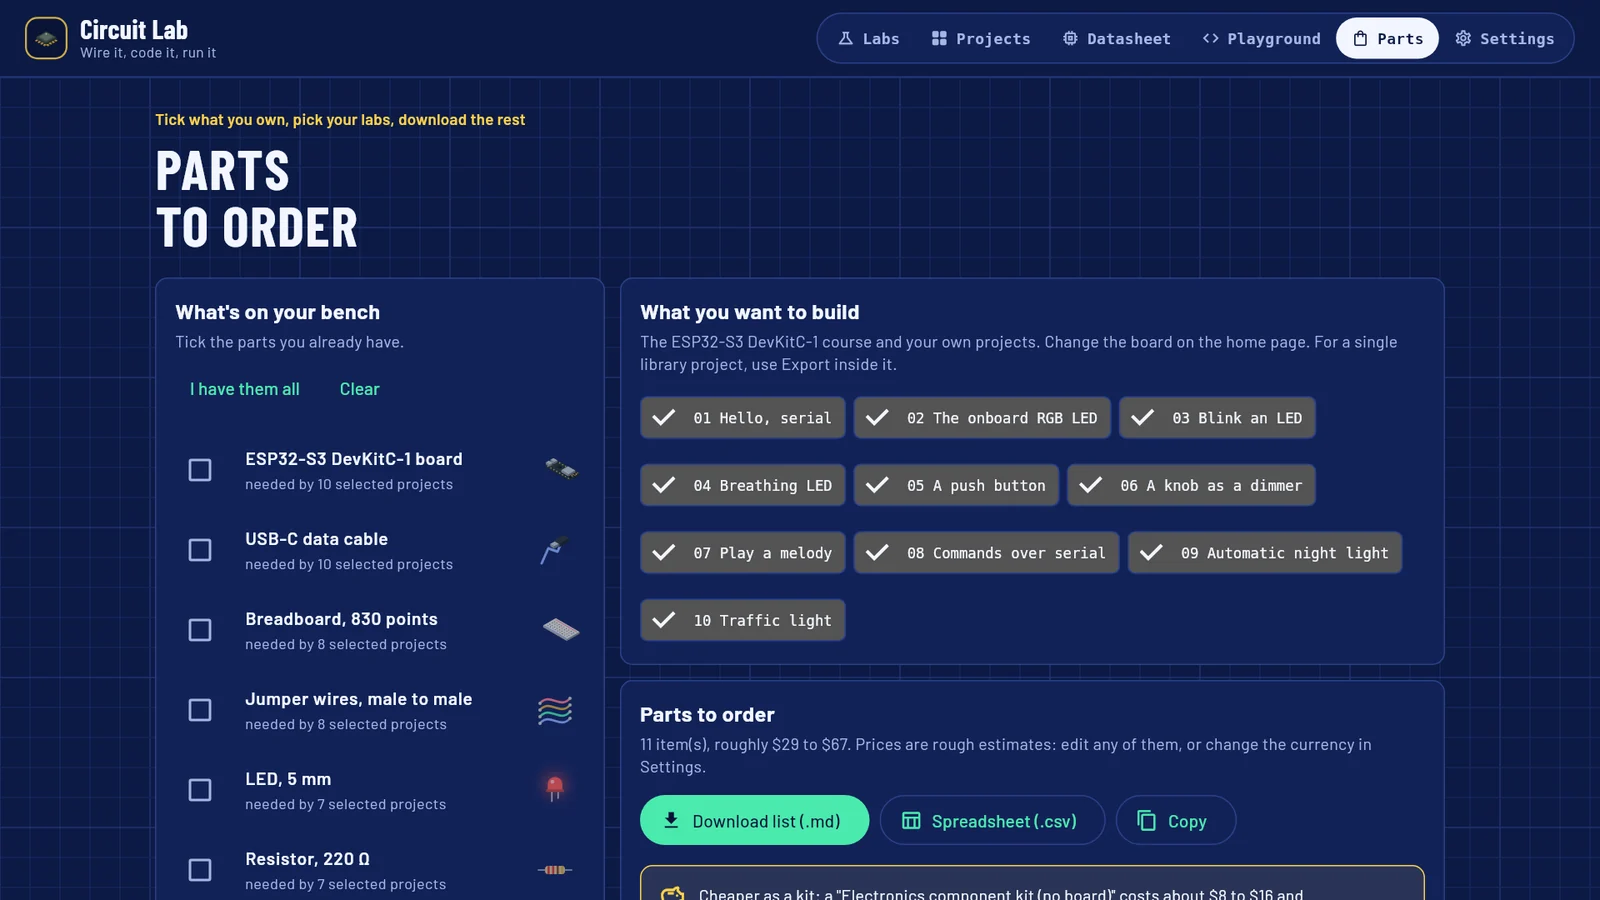
Make a shopping list
Open the Parts tab.
Under What's on your bench, tick the parts you already have. I have them all ticks every part shown; Clear unticks them.
These ticks are the same as the ones on the Labs tab.
Under What you want to build, select the labs and projects to include. The choices are the course for your board and all of your own projects. Everything is selected at first.
Read Parts to order: how many items you need and a rough budget.
Select Download list (.md) for a checklist, Spreadsheet (.csv) for a spreadsheet, or Copy to put the list on the clipboard.
The files are called circuit-lab-parts.md and circuit-lab-parts.csv. To change which board's course is listed, change Your board on the Labs tab.
For a single library project, open it and use Parts to order (.csv) in its Export menu.
What each line tells you
Each part on the list shows:
- how many you need;
- Look for: what to check when buying, such as the exact type;
- Price, or Your price if you set one, with the pack size for parts sold in packs;
- Labs: which of the selected labs and projects use it;
- Tip: advice for that part;
- Or use: an alternative, when there is one.
Quantities are the most that any one project needs, not the total, because parts move from one project to the next rather than being used up.
The search button next to a part opens a shop search in your browser. Only the part's name is in the link.
Kits and suggestions
When a starter kit would cost less than buying its parts one by one, the list says Cheaper as a kit, with both prices and what the kit replaces. Kit contents vary, so check the listing. The search button next to it looks for the kit.
Under Suggestions the list adds tips that fit your selection, such as:
- a cheaper board that runs most projects, when the board on the list is one of the more expensive ones;
- that Arduino clones with a CH340 chip run the same sketches for less;
- that one resistor assortment covers every resistor, so it is counted once in the budget;
- that the buzzer must be passive, because active buzzers cannot play notes;
- that a 3.3 V board needs the HC-SR04P distance sensor, or two resistors on the ECHO pin;
- which single part would make the most labs buildable, for a tight budget.
Prices and currency
Built-in prices are rough US-dollar ranges for budgeting, not quotes. Prices vary by shop and country.
Show prices in your currency
Open Settings. On a phone-sized screen, it is the gear at the top of the Labs tab.
Under Currency, select a symbol or type one in Symbol.
In 1 US dollar equals, type how many of your currency one dollar buys today.
Select Apply.
Every price, budget and export then uses your currency. The app does not look up exchange rates for you, so update the rate yourself now and then.
Set your own price
On the Parts tab, select the pencil (Set your own price) next to a part under Parts to order.
Type the From and To prices where you shop. Use the same number twice for an exact price.
Select Save.
Once a part has your price, the same dialog has Use the estimate, which goes back to the built-in price.
Your prices replace the estimates in budgets and exports. Settings lists the parts you have priced, and Use estimates again clears them all.