
Your first API call
In about ten minutes you will send two real requests with ApiWorkbench, read what comes back, and add a test that checks the answer for you.
What you need
- ApiWorkbench installed. See Install ApiWorkbench.
- An internet connection. The lesson uses JSONPlaceholder (
jsonplaceholder.typicode.com), a free public practice API. It accepts any request and never really stores what you send.
No internet?
Do Your first mock server first, then follow this lesson against your own mock at http://localhost: and its port.
Know the window
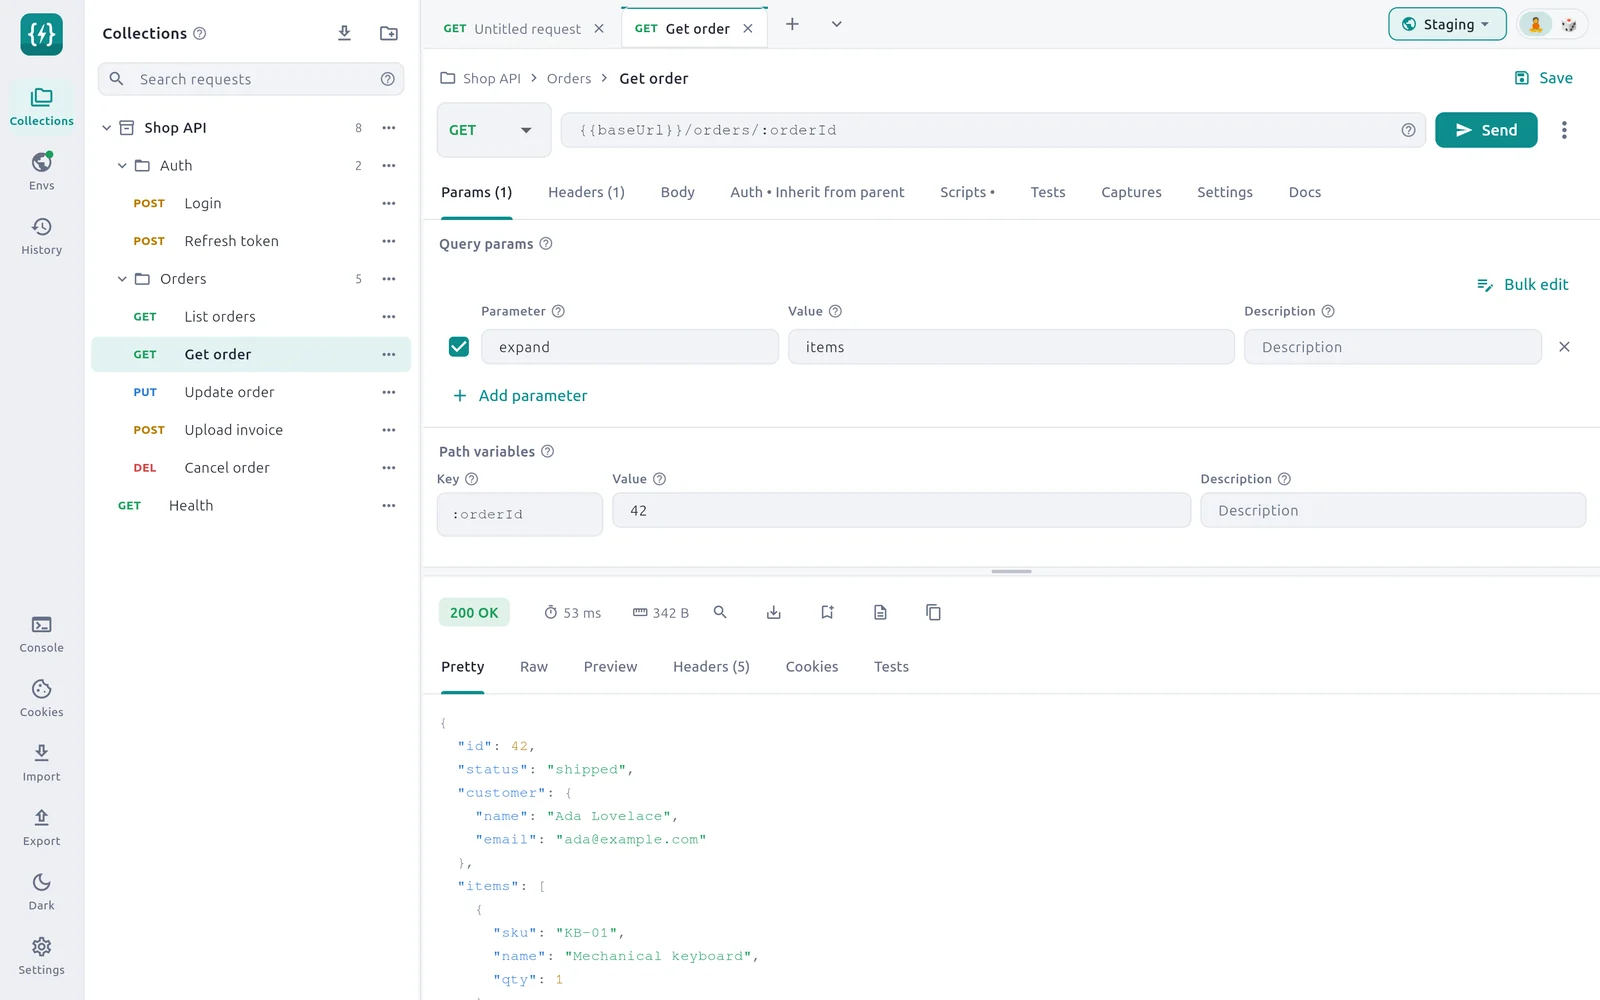
- 1Rail — Collections, Envs, History, Console, Cookies, Import, Export and Settings.
- 2Collections — Your saved requests, grouped in collections and folders.
- 3Request tabs — Each open request has a tab. The + opens a new one.
- 4Method — GET, POST, PUT and the rest.
- 5URL — Where the request goes.
- 6Send — Sends the request.
- 7Request parts — Params, Headers, Body, Auth, Scripts, Tests, Captures, Settings and Docs.
- 8Result bar — Status, time taken and size of the response.
- 9Response — The data that came back.
Part 1: read something with GET
Open ApiWorkbench. Select the + next to the request tabs to open a new request.
Leave the method as GET. In the URL box, type:
texthttps://jsonplaceholder.typicode.com/todos/1Select Send, or press Ctrl + Enter.
Look at the result bar. You should see 200 OK, a time in milliseconds and a size.
Read the Pretty tab:
json{ "userId": 1, "id": 1, "title": "delectus aut autem", "completed": false }
You asked the server to read todo number 1, and it sent it back as JSON. That is a complete API call.
Now change the 1 at the end of the URL to 9999 and send again. The status becomes 404 Not Found: there is no such todo. The API is telling you what went wrong with a status code, which is exactly what you will test for later.
Part 2: add a query parameter
Change the URL to
https://jsonplaceholder.typicode.com/todos.Open the Params tab and select Add parameter. Enter
userIdas the parameter and1as the value.Select Send.
The response is now a list, limited to the todos of user 1. The request that went out was /todos?userId=1; the Params tab built the query string for you.
Part 3: send data with POST
Open a new request tab. Set the method to POST and the URL to:
texthttps://jsonplaceholder.typicode.com/todosOpen the Body tab and choose JSON.
Type this body:
json{ "title": "Learn API testing", "completed": false, "userId": 1 }Select Send.
The status is 201 Created, and the response repeats your todo with a new id. ApiWorkbench set the Content-Type: application/json header for you because you chose the JSON body type.
Part 4: let a test check the answer
Reading the status yourself works once. A test does it every time.
Go back to the GET request for
/todos/1(set the URL again if you changed it).Open the Tests tab and add these three tests:
Test Field Expected Status equals 200JSON field equals id1Time below (ms) 2000Select Send.
In the response panel, open the Tests tab. Each test shows whether it passed, and why.
Change the expected status to 201 and send again to see what a failed test looks like. Then put it back.
Part 5: save your work
Select Save (or press Ctrl + S), give the request a name such as Get one todo, and put it in a new collection called Practice. It now appears under Collections, with its tests, ready to run again tomorrow.
What you learned
- GET reads, POST sends data. The status code says how it went.
- Params builds the query string; Body holds the data you send.
- A test checks the response automatically after every send.
- Saved requests live in collections.
Next steps
- Your first mock server: build the API yourself
- Send your first request: the same journey in more depth
- Todo API lab: a whole test suite, ready to import